在不同的应用程序中使用摄像头是很正常的。 但在实现它时,你可能会面临各种问题: 例如,如果你在一个电子商务的应用程序中,需要管理不同的东西,需要选择不同的项目,也需要用图片发布我们的回应,那时我们就需要编写一个单一的代码库,从那里我们可以在整个应用程序的不同位置管理摄像头。
因此,让我们来看看它的实现,从那里我们会看到我们是如何做到的
代码实现: 为了实现这个功能,我们需要添加一些依赖性
camera:image_cropper:image_picker:path_provider:注意:image_cropper需要在manifest.xml文件中添加一些东西。你可以在imageCropper插件中找到这些需要注意的地方。
比如: 还需要在Android平台中添加如下代码: AndroidManifest.xml文件中
<activity android:name="com.yalantis.ucrop.UCropActivity" android:screenOrientation="portrait" android:theme="@style/Theme.AppCompat.Light.NoActionBar"/>camera插件用于访问相机,image_cropper用于编辑点击或挑选的图像,path_provider用于寻找文件系统上的常用位置,image_picker用于挑选图像。
import 'dart:io';
import 'package:flutter/material.dart';import 'package:image_cropper/image_cropper.dart';import 'package:image_picker/image_picker.dart';
onImageButtonPressed(ImageSource source, {BuildContext context, capturedImageFile}) async { final ImagePicker _picker = ImagePicker(); File val;
final pickedFile = await _picker.getImage( source: source, );
val = await ImageCropper().cropImage( sourcePath: pickedFile.path, aspectRatio: CropAspectRatio(ratioX: 1, ratioY: 1), compressQuality: 100, maxHeight: 700, maxWidth: 700, compressFormat: ImageCompressFormat.jpg, ); print("cropper ${val.runtimeType}"); capturedImageFile(val.path);
}
typedef CapturedImageFile = String Function(String);typedef void OnPickImageCallback( double maxWidth, double maxHeight, int quality);在上面的代码中,你可以很容易地看到这个方法通过一个回调函数返回一个字符串文件,这个回调函数就是CaptureImageFile函数,通过这个函数我们将收到一个被点击或被选中的图片。
在这个方法中,我们已经创建了一个图像采集器的实例变量…… final ImagePicker _picker = ImagePicker()。
并通过使用这个变量,我们将通过内置的getImage方法获得图像文件。
final pickedFile = await _picker.getImage( source: source,);现在,我们在pickFile变量中拥有一个文件,我们需要像下面的图片所示那样裁剪一个文件
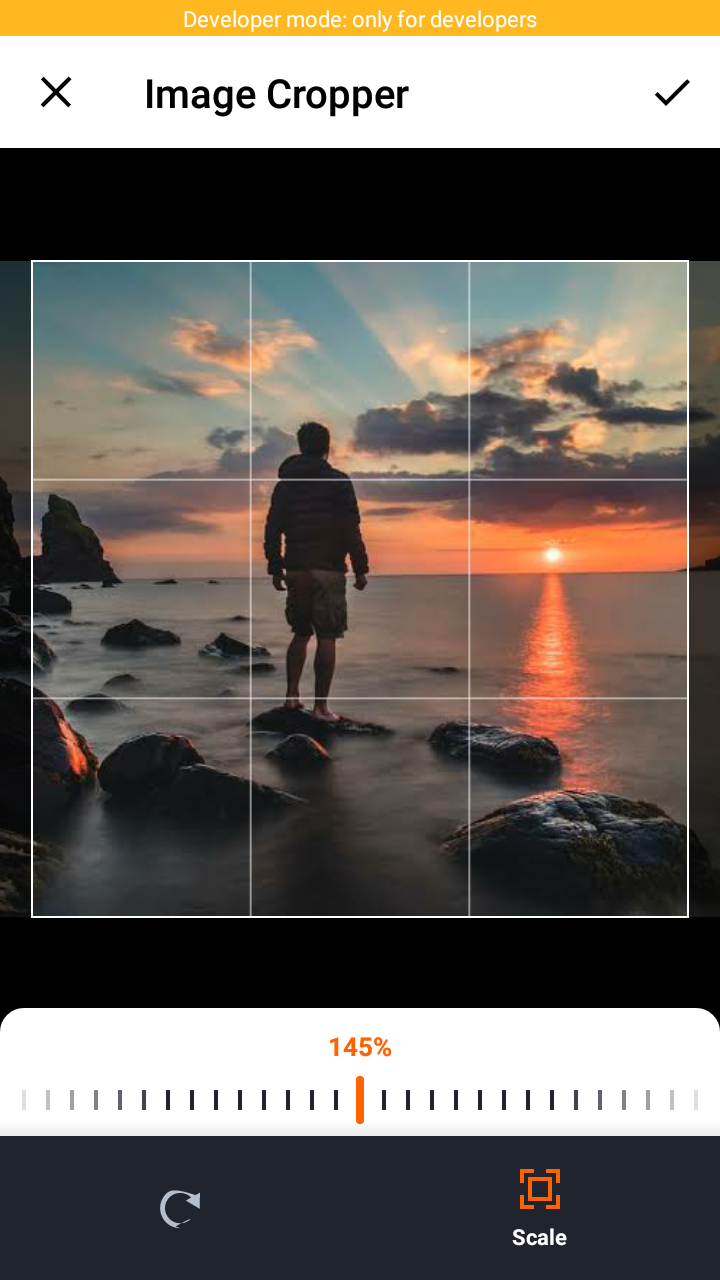
val = await ImageCropper().cropImage( sourcePath: pickedFile.path, aspectRatio: CropAspectRatio(ratioX: 1, ratioY: 1), compressQuality: 100, maxHeight: 700, maxWidth: 700, compressFormat: ImageCompressFormat.jpg,);在这个方法中,ImageCropper.crop Image()需要不同的参数,你需要提供你的文件路径,你可以提供你想最小化图片的比例和图片的尺寸,你也可以设置你想接收图片的格式。
在编辑完所选的图片后,我们需要返回文件,我们通过向回调函数提供图片来完成同样的工作,就像这样……
capturedImageFile(val.path);现在该方法以字符串格式返回图片。
在下面的图片中,你可以看到我们有两个不同的按钮,我们通过它们调用两个不同的方法,一个用于相机,另一个用于相册。
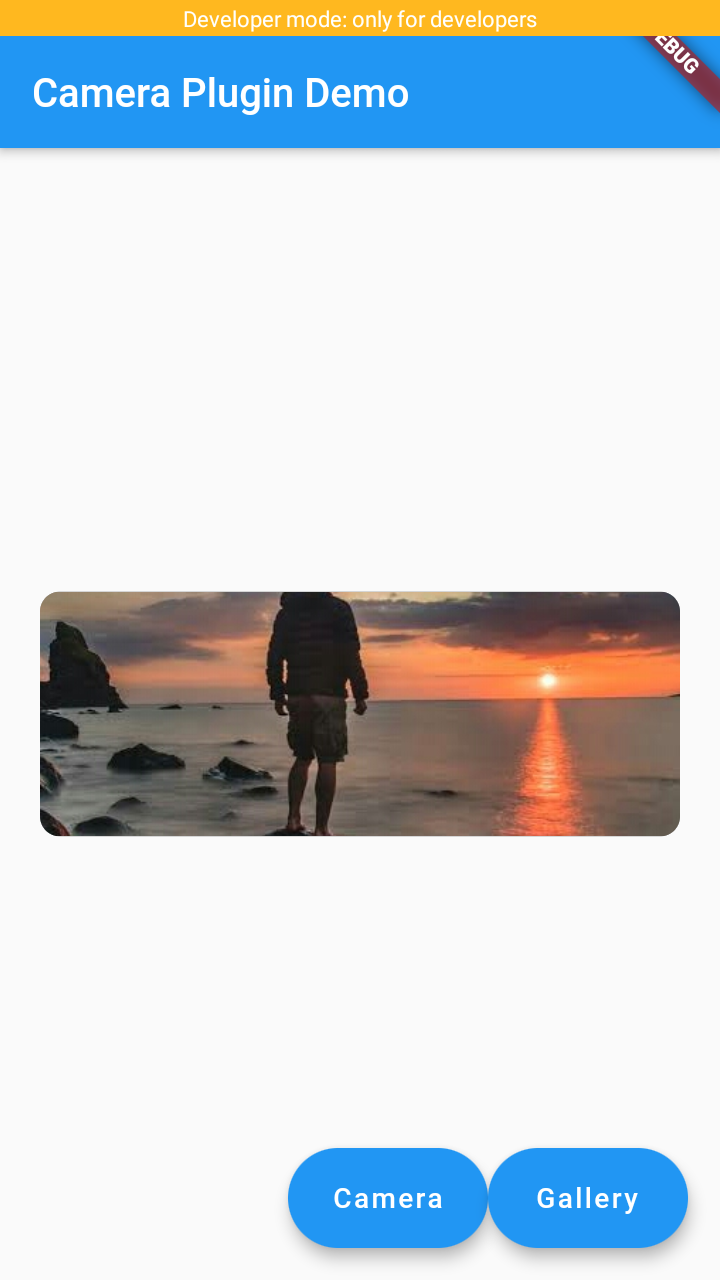
onImageButtonPressed( ImageSource.camera, context: context, capturedImageFile: (s) { setState(() { _imageFile = s; }); },);当按钮被按下时,我们调用这个方法。在这里,我们要发送不同的参数,其中最重要的一个是参数,通过这个参数,该方法可以知道哪个动作要发生。
对于相机,我们使用ImageSource.camera;对于相册,使用ImageSource.gallery。
CaputuredImageFile是一个回调函数,我们通过它接收文件并根据我们的需要使用它。
import 'package:flutter/material.dart';import 'package:flutter/cupertino.dart';import 'package:flutter_camera_demo/camera_gallary_image_picker.dart';import 'package:image_picker/image_picker.dart';
class MyHomePage extends StatefulWidget { MyHomePage({Key key, this.title}) : super(key: key);
final String title;
@override _MyHomePageState createState() => _MyHomePageState();}
class _MyHomePageState extends State<MyHomePage> { String _imageFile; var _width;
@override Widget build(BuildContext context) { _width = MediaQuery.of(context).size.width; return Scaffold( appBar: AppBar( title: Text(widget.title), ), body: Center( child: Padding( padding: const EdgeInsets.only(left: 20, right: 20), child: _previewImage(context), ), ), floatingActionButton: Row( mainAxisAlignment: MainAxisAlignment.end, children: [ Container( width: 100.0, height: 50.0, child: FloatingActionButton.extended( label: Text("Camera"),
shape: RoundedRectangleBorder( borderRadius: BorderRadius.circular(50)),
onPressed: () { onImageButtonPressed( ImageSource.camera, context: context, capturedImageFile: (s) { setState(() { _imageFile = s; }); }, ); }, ), ), Container( width: 100.0, height: 50.0, child: FloatingActionButton.extended( label: Text("Gallery"), shape: RoundedRectangleBorder( borderRadius: BorderRadius.circular(50)), onPressed: () { onImageButtonPressed( ImageSource.gallery, context: context, capturedImageFile: (s) { print("file path ${s}"); setState(() { _imageFile = s; }); }, ); }, ), ), ], ), // This trailing comma makes auto-formatting nicer for build methods. ); }
Widget _previewImage( BuildContext context, ) { _width = MediaQuery.of(context).size.width; if (_imageFile != null) { return Container( height: _width * 0.34, decoration: BoxDecoration( borderRadius: BorderRadius.all( Radius.circular(10), ), color: Colors.grey, ), child: ClipRRect( borderRadius: BorderRadius.circular(10), child: Image.asset( "${_imageFile}", height: _width * 0.34, width: _width, alignment: Alignment.center, fit: BoxFit.fitWidth, ), ), ); } else { return Container( height: _width * 0.34, decoration: BoxDecoration( borderRadius: BorderRadius.all( Radius.circular(10), ), color: Colors.grey, ), child: Center( child: Image.asset( 'assets/images/wishlists/cam-img.png', width: 24, height: 20, ), ), ); } }}总结: 事实上,有不同的方法来访问相机和从图片库中挑选图片,但最重要的是以最简单的方式定义事物,并轻松地工作。 在这个例子中,我以最简单的方式展示了这些东西,如果你想尝试,你只需要复制这些代码文件并添加这些依赖性,它就会开始工作啦,要不你试试捏!